Creating references via public link
Public links allow you to collect references directly from external users, such as customers or partners, while also collecting their consent and usage rights.
Written By Hublyd
Note: this feature is only available on premium plans (Warm up and Podium)
How public reference links work
Instead of filling references yourself, you can send a secure public link that lets someone else fill in the reference form.
Sending a public reference link
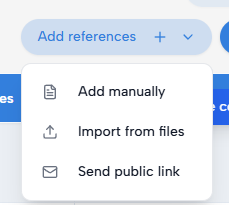
Go to the References section
Click Add references
Select Send public link
Configuring the public link
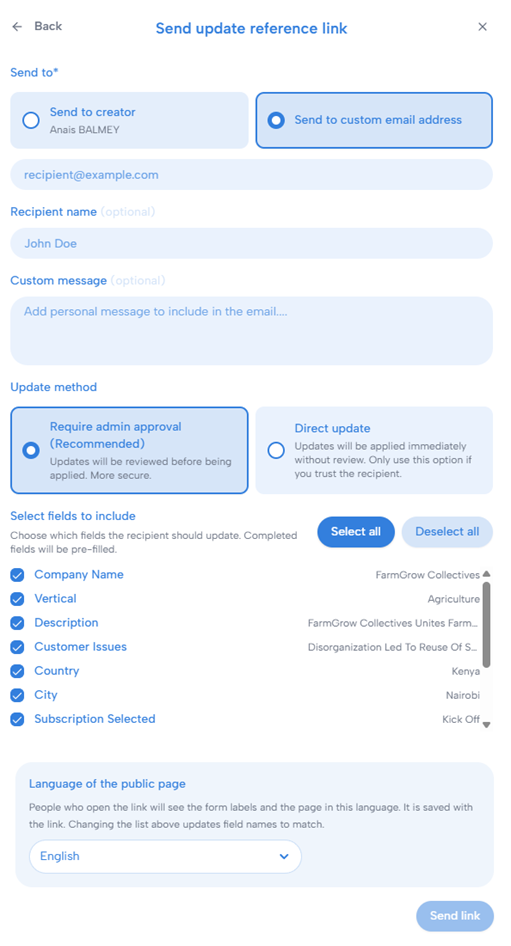
When sending the link, you can:
Enter the recipient’s email
Add an optional recipient name
Add a custom message
Choose which fields the recipient should fill
Choose the language displayed on the public page
Only the selected fields will be visible in the public form.
What the recipient sees
The recipient receives an email with access to a secure public page. They do not need a Hublyd account. The public page is divided into two main steps.
1. Filling the reference form
First, the recipient fills in the requested reference information.
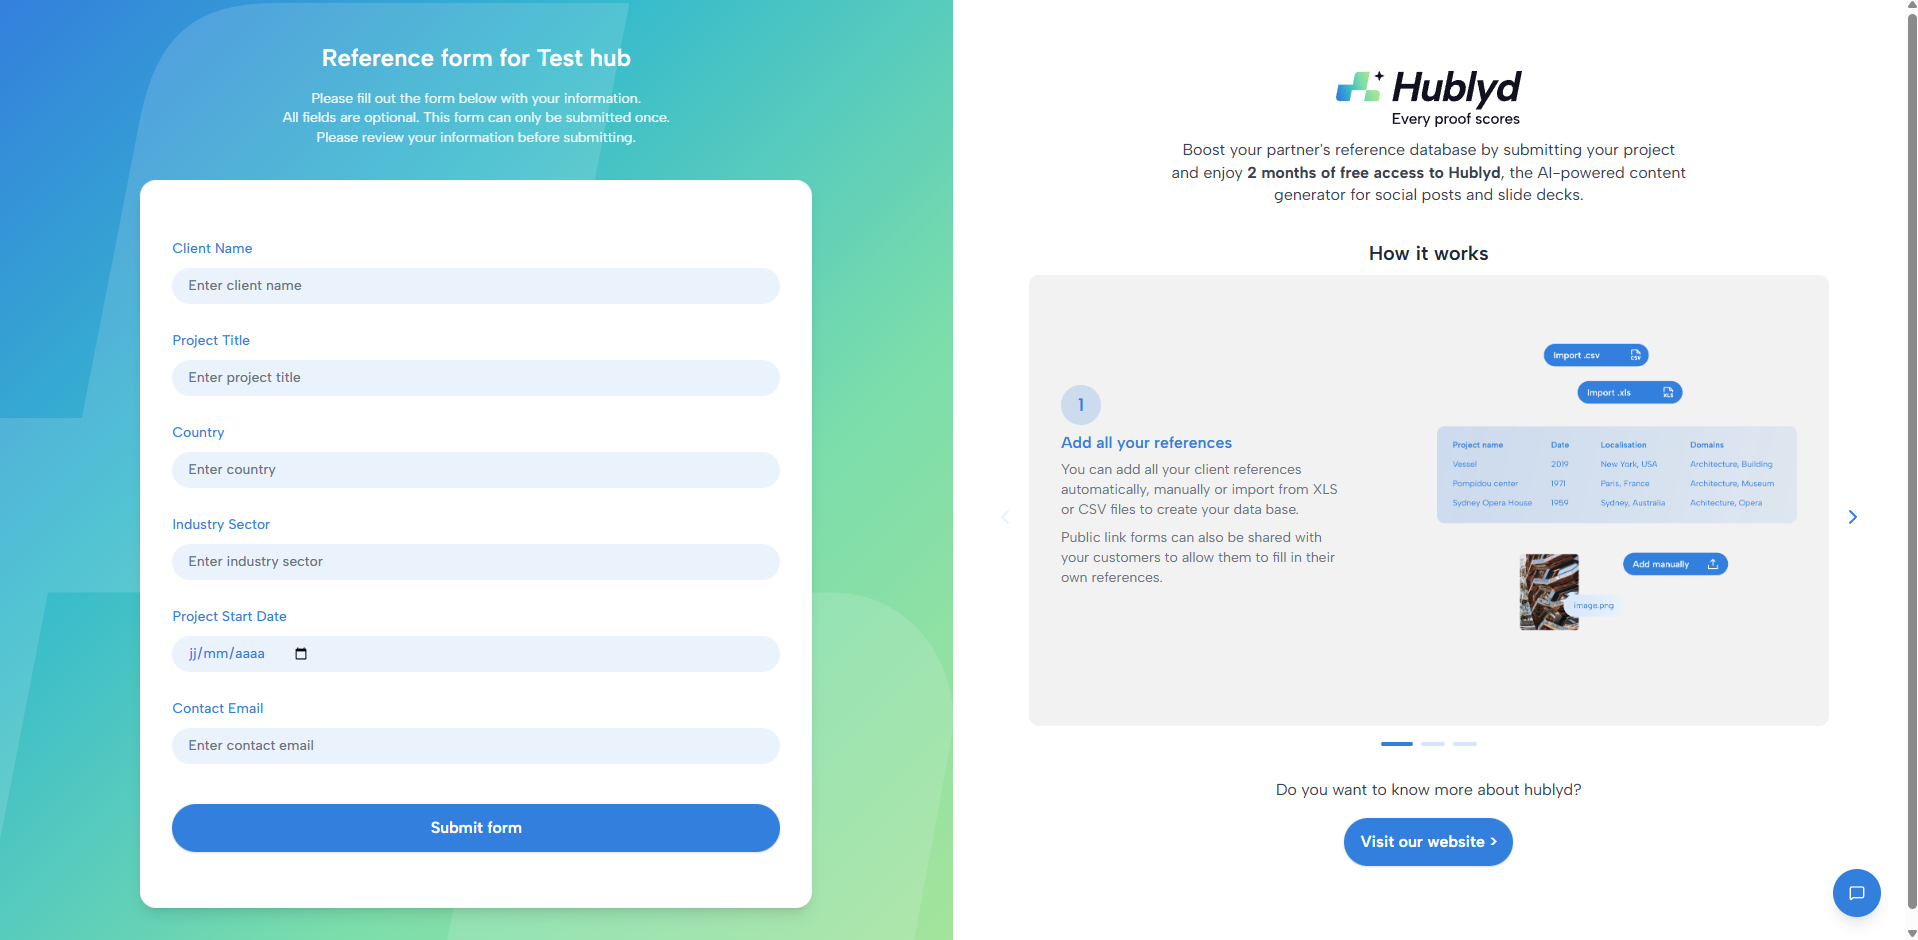
Only the fields selected when the link was created are displayed on the form. All fields are optional, but the form can only be submitted once, so the recipient should review the information carefully before continuing.
2. Confirming consent and usage rights
Before submitting the form, the recipient is asked to confirm how the reference may be used.
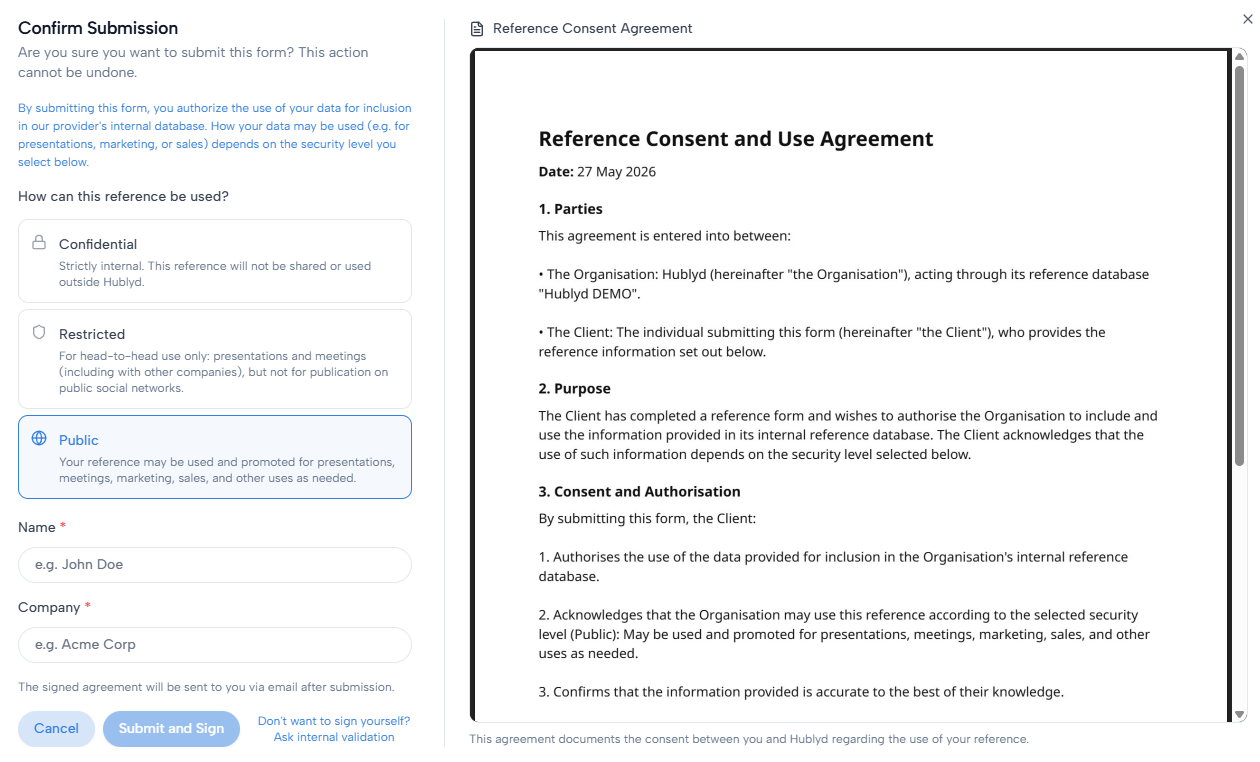
They can choose one of the available security levels:
Confidential: strictly internal use only.
Restricted: for head-to-head presentations and meetings only.
Public: can be used for presentations, marketing, sales, and other external uses.
Hublyd then displays a generated Reference Consent and Use Agreement. The recipient must review it, enter their name and company, then click Submit and Sign.
The signed agreement is sent by email after submission.
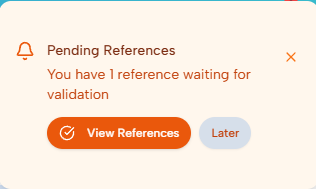
Validation process
Once the form is submitted:
The reference is created with a Pending status
It is not yet added to the library
To finalize it:
The sender or
An administrator
must validate the reference.
Understanding the validation screen
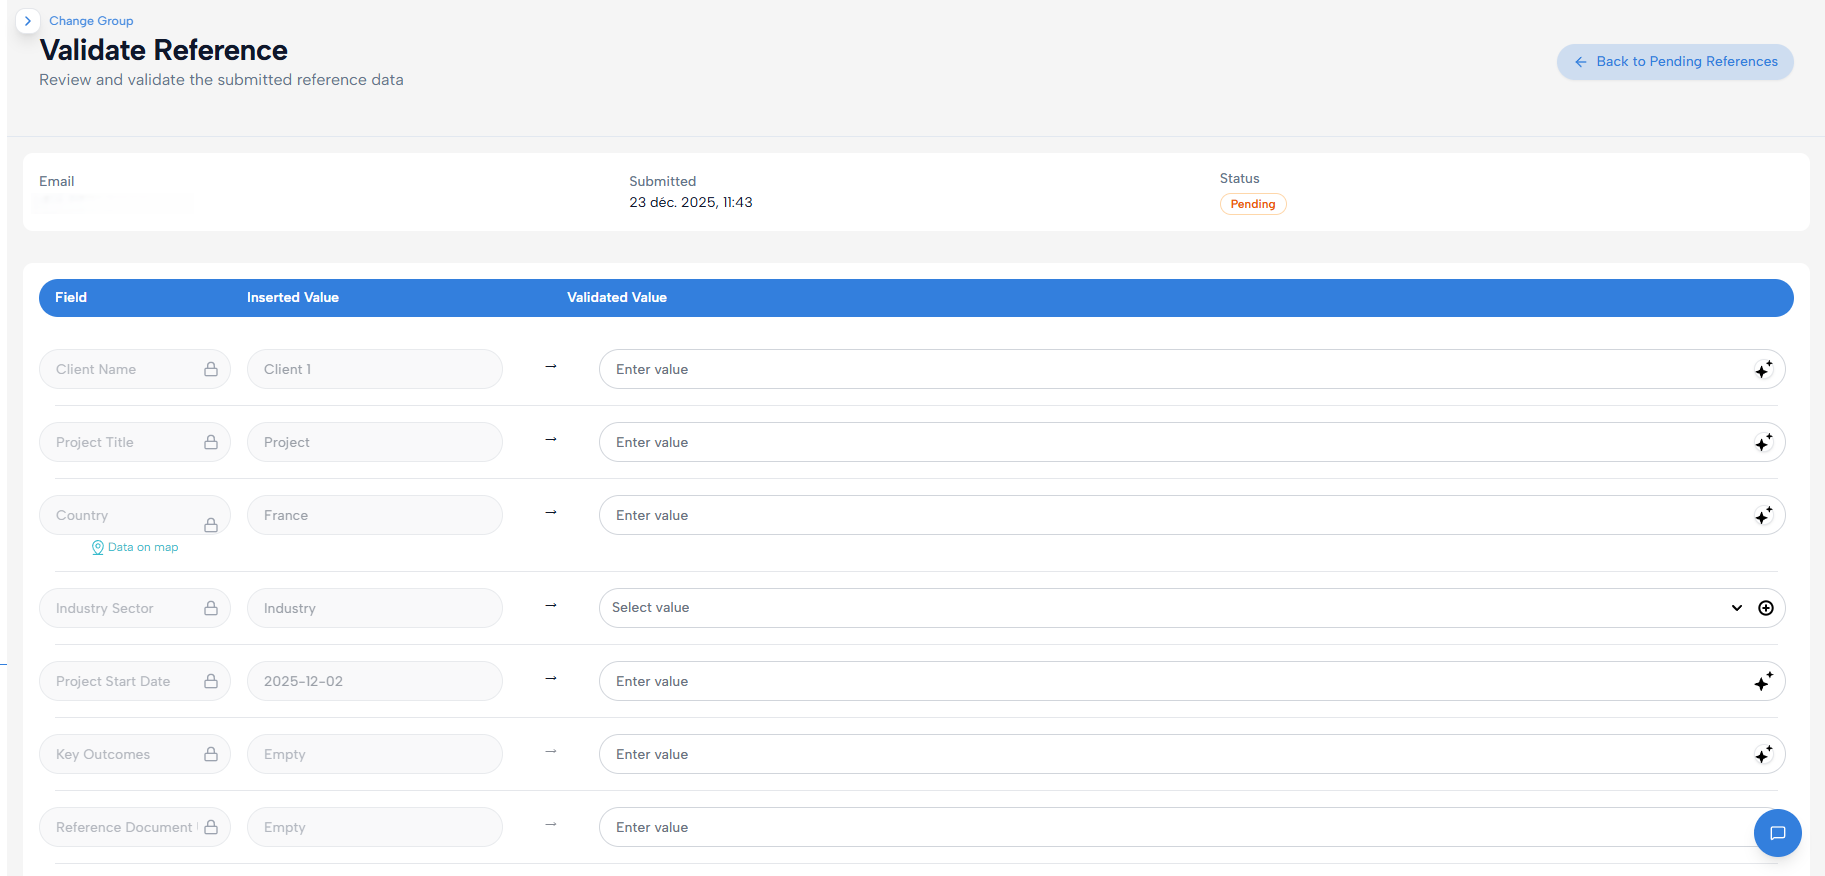
Submission details (top section)
At the top of the screen, you’ll find:
Email: the email address of the person who submitted the reference
Submitted: date and time of submission
Status: current state of the reference (Pending)
This helps you identify who submitted the data and when.
Field comparison: inserted vs validated values
Each reference field is displayed on a single row, split into two parts:
Inserted Value
This is the value entered by the external user via the public form.Validated Value
This is the value that will be saved in your library once validated.
You can:
Keep the submitted value as-is (by clicking the arrow)
Edit or correct the value
Complete missing fields
Adjust formatting to match your internal standards
Nothing is added to the library until validated.
Locked fields and schema rules
Some fields may appear locked:
These fields are defined by the library schema
Their structure or type cannot be changed during validation
Validation respects your existing reference structure.
Validating the reference
Once you’ve reviewed all fields:
Ensure the validated values are correct
Complete any missing or incomplete data
Confirm the validation
When validated:
The reference is added as a new row in the library
Its status changes from Pending to Validated
It becomes available for filtering, selection, and slide generation